Sunday, August 28, 2011

Pastries - Chicken and Crab pies

I got a little lazy in Ramadan so I used a store-bought pack of puff pastry for Ebrahim's lunch pies - instead of making everything from scratch. Except that I didn't make the usual types of pies this time.

Nostalgic for home, especially at this time of the year, I had a strong craving for Chicken Patties, so I made some in chicken, and a whole pie with crab meat instead.


For the chicken mixture, I boiled some boneless pieces in salted water, and mixed in some roasted garlic cream cheese, pepper, peas, and corn.

For the crab meat, I saute'ed the meat in butter, crumbled it and mixed in some dijon mustard, finely chopped green onions, cream cheese, black pepper, salt, paprika, and some milk to smoothen the consistency.


To prepare a whole pie, I rolled out the puff pastry into a large rectangle (around 10 x 14-inch). The dough can be tricky to work with it, but I used parchment paper and lots of white flour to keep the dough under control and it worked just fine.


Then I made some egg wash by mixing in one egg with some cold water, and brushed it all over the rolled out dough. I placed the mixture in the centre and cut out the sides such that each side looked like one end of a V - remember to keep equal number of strips on each side!


To wrap the pie I folded across the strips alternating each side and pressing down to make sure they stick together.


Then I brushed the top with some egg wash and baked at 400F for 20 minutes, till the sides had browned.


For the chicken patties I did the same except that I cut out the rolled dough into 9 squares, and filled out the centres.


For the shape I did something slightly different, and the pictures below can explain it a lot better!


I forgot to use egg wash with the chicken patties so I brushed some milk on the top just before I popped them in the oven at 400F for 15-20 minutes.


I also froze some (uncooked) for Ebrahim's school snack. They bake well directly from the freezer at 400F for 20-30 minutes, or till the sides have browned.


Saturday, August 13, 2011

Layered Chocolate Mousse Cake

A work-friend is leaving our department at the end of Summer and some of us decided to throw a small farewell party for her. It had to be a gluten-free cake, so something with no white/cake flour. I'm not much of an expert with using other kinds of flours like Almond and Oat Flour so I decided to make a no-bake chocolate mousse cake!


It wasn't completely 100% gluten free since I used crushed Oreos as the base, but the alternative was baking a chocolate cake, and using Oreos was simpler :o)

So for the ingredients you need a big pack of Oreos, Butter, Dark Chocolate, Milk Chocolate, and Whipping Cream. Don't bother calculating the calories for this one!

For the equipment you need a round springform pan, plastic wrap, spatula, pestle, and an electric beater. And of course a refrigerator!

I used 3/4th of the cookies in the pack, put them in a bowl and crushed them with the pestle till the cookies were a coarse mix. To bring them together I added 1/4 cup of melted butter and mixed well. The butter acts as glue to hold the cookies together once the cake is refrigerated - so it becomes a nice crunchy base as the butter hardens.


Then I wrapped the sides of the springform pan with plastic wrap so it would be easier for me to take the cake out once it was done. I put the pan back together and pressed down the cookies to form the base. Then it went in the fridge while I worked on the dark and milk chocolate layers for the cake.


Making the mousse is simple. No raw eggs (or any eggs for that matter), and no gelatin. For 1 cup of chocolate chips/baking chocolate (dark and milk, each) I added 1.5 cups of boiling whipping cream. After it stood long enough for the chocolate to melt (5 minutes) I started mixing the chocolate till it was incorporated with the cream. Then I left it to cool to room temperature, and finally in the fridge till it was cool enough to whip with a beater (1 hour).


The cooler the chocolate cream, the faster it will whip to form peaks. Once the chocolate was cool enough I started mixing with an electric beater till it formed stiff peaks. This takes much longer than it would take to whip plain whipping cream as the chocolate makes the mixture heavier. It took me around 20 minutes to whip up the cream but make sure you stop as soon as the peaks start forming because over-beating will cause the chocolate and cream to separate and your mix will go grainy. You can tell this is happening if the mix at the edges of the bowl starts looking grainy (looks like tiny chocolate spots instead of smooth texture). That would be the time to stop for sure :o)


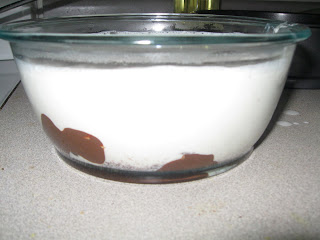
I wanted the darker colors first, so I first whipped up the dark chocolate, put it over the cookie base, evened it out, and popped it back in the fridge. Then I prepared the milk chocolate mousse, put it over the dark chocolate mousse and popped it back in the fridge.


For the final layer I wanted something that looked like a chocolate ganache but didn't harden too much so it would be easier to cut the slices. So I removed the sides of the springform pan, peeled off the plastics from the sides of the cake and the cake was ready for the final topping!


For the topping, I had reserved some of the dark chocolate cream (around 1/4 cup) before I had whipped it for making the dark chocolate mousse. Since the cream was chilled, I melted it in the microwave and poured it on top of the chilled cake and let some of it drip on the side. To catch the droppings on the base I inserted strips of parchment under the cake and that served the purpose quite well!


All the cake needed then was more time in the fridge (3-4 hours) and even more patience from your 4 year old, if you have one ;o)

Its very important what chocolate you use since that brings the entire flavor to this cake. I use Callebaut only, whether its dark, milk or white chocolate. One simple test is to bite off some of the chocolate before you use it since that is how the mousse will taste too!


Monday, July 25, 2011

Chicken Sliders!

I promised a few burger recipes as part of the "Burger Series". I've covered Chicken burgers, and Fillet O Fish, and here's a great one for Sliders! You could try this in Beef as well - good quality Beef!


You'll be surprised how easy these are to make. For 1 lb of ground chicken (leg and thigh piece) add 1/2 a packet of Onion Soup mix (you could use more of the packet but be careful adding the salt later). I use Roasted Garlic and Onion Soup mix from Lipton. Mix together with a couple tablespoons of Worcestershire Sauce, 1/2 tablespoon Tabasco (optional - or to taste), and a dash of Salt.

Depending on your soup mix you may want to fry a small sample of the chicken mixture first to figure out how much salt you need to add. You could do the same before adding the Tabasco sauce if you're unsure about the spices!


Heat griddle (or any large flat frying pan) to med-high heat and add a few teaspoons of oil.  Sliders are basically mini cheese burgers, traditionally very thin and eaten as 3-4 sliders per serving. I make my sliders slightly different, much thicker than usual burgers, and I don't always fry them with onions - you could if you like.

I take a big chunk of meat in my hands, lay it out on the griddle, and use the spoon to shape it round enough to fit the mini buns. Flip over when one side is done. The middle part will be raw so cover it up as it cooks the second side and you'll have juicy thick burgers grilled to perfection!


For an original slider, fry some chopped onions on the griddle and place a thin burger patty on top of the onions. Cook till one side is done and flip over and cook till both sides are cooked through.

Slide on the burger to the buns straight from the griddle. Top with cheese and sauce of your choice (mayo, ranch, chipotle, etc.) and eat them fresh and hot!


Saturday, July 16, 2011

Garlic Bread / Bruschetta

Here is a good side for pasta, fish, or baked chicken.


Slice a roll of french bread into thick slices. Rub each side with Margarine or butter and sprinkle with Italian Seasoning mix (includes garlic powder). Toast in oven till sides are brown.

For Bruschetta, do the same but add some chopped tomatoes (I chop the tomatoes with some garlic) mixed with some parsley (I use curly parsley or Italian parsley as they don't get soggy and add some crunch). Toast in oven till sides are brown.


Filet O Fish!

No need to go to a restaurant next time you crave a Filet O Fish. Its the simplest dish to make and ever so yummy!


Most restaurants use Cod or Haddock to make the fillets, but I prefer the texture and taste of Basa. Cut each fillet into half, wash and pat dry.


For the batter, mix together equal parts of white flour and corn starch,  and season with salt, pepper, chilli powder. For 8 halves (4 fillets) I use 3/4 cup white flour and corn starch each. The seasonings are to taste, around 1 tsp of salt will do the job. Also add 1 tsp baking powder and baking soda each.


Bring the dough together by adding 1 egg and some "cold" water till mixture is smooth and not too runny. Add a tbsp of lemon juice and give it another mix.


The fillets are deep fried so depending on what you use for frying, prepare the deep fryer or skillet so the oil is heated through at med - high. Dip each fillet in the batter and when coated well transfer into the hot oil.


Basa cooks fast so you will need to cook each side for around 3-4 minutes or till the outsides are golden brown and crisp.

Top the burger with your favorite toppings: lettuce, tomatoes, cucumbers, cheese etc. I use tartar sauce instead of mayo.


For any left over batter I take some sliced red onions, dip them in and fry them for Onion Rings.


You could also cut strips of the fillet and fry the same way for a great snack for kids, or for adults serve the strips with Garlic Bread / Bruschetta.