It wasn't completely 100% gluten free since I used crushed Oreos as the base, but the alternative was baking a chocolate cake, and using Oreos was simpler :o)
So for the ingredients you need a big pack of Oreos, Butter, Dark Chocolate, Milk Chocolate, and Whipping Cream. Don't bother calculating the calories for this one!
For the equipment you need a round springform pan, plastic wrap, spatula, pestle, and an electric beater. And of course a refrigerator!
I used 3/4th of the cookies in the pack, put them in a bowl and crushed them with the pestle till the cookies were a coarse mix. To bring them together I added 1/4 cup of melted butter and mixed well. The butter acts as glue to hold the cookies together once the cake is refrigerated - so it becomes a nice crunchy base as the butter hardens.
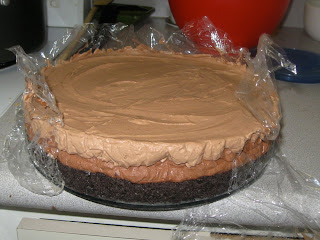
Then I wrapped the sides of the springform pan with plastic wrap so it would be easier for me to take the cake out once it was done. I put the pan back together and pressed down the cookies to form the base. Then it went in the fridge while I worked on the dark and milk chocolate layers for the cake.
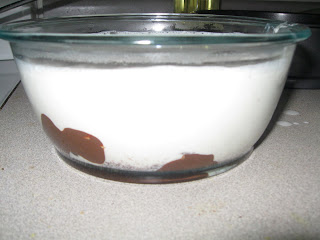
Making the mousse is simple. No raw eggs (or any eggs for that matter), and no gelatin. For 1 cup of chocolate chips/baking chocolate (dark and milk, each) I added 1.5 cups of boiling whipping cream. After it stood long enough for the chocolate to melt (5 minutes) I started mixing the chocolate till it was incorporated with the cream. Then I left it to cool to room temperature, and finally in the fridge till it was cool enough to whip with a beater (1 hour).
The cooler the chocolate cream, the faster it will whip to form peaks. Once the chocolate was cool enough I started mixing with an electric beater till it formed stiff peaks. This takes much longer than it would take to whip plain whipping cream as the chocolate makes the mixture heavier. It took me around 20 minutes to whip up the cream but make sure you stop as soon as the peaks start forming because over-beating will cause the chocolate and cream to separate and your mix will go grainy. You can tell this is happening if the mix at the edges of the bowl starts looking grainy (looks like tiny chocolate spots instead of smooth texture). That would be the time to stop for sure :o)
I wanted the darker colors first, so I first whipped up the dark chocolate, put it over the cookie base, evened it out, and popped it back in the fridge. Then I prepared the milk chocolate mousse, put it over the dark chocolate mousse and popped it back in the fridge.
For the final layer I wanted something that looked like a chocolate ganache but didn't harden too much so it would be easier to cut the slices. So I removed the sides of the springform pan, peeled off the plastics from the sides of the cake and the cake was ready for the final topping!
For the topping, I had reserved some of the dark chocolate cream (around 1/4 cup) before I had whipped it for making the dark chocolate mousse. Since the cream was chilled, I melted it in the microwave and poured it on top of the chilled cake and let some of it drip on the side. To catch the droppings on the base I inserted strips of parchment under the cake and that served the purpose quite well!
All the cake needed then was more time in the fridge (3-4 hours) and even more patience from your 4 year old, if you have one ;o)
Its very important what chocolate you use since that brings the entire flavor to this cake. I use Callebaut only, whether its dark, milk or white chocolate. One simple test is to bite off some of the chocolate before you use it since that is how the mousse will taste too!


No comments:
Post a Comment